Building core strength and stability is essential not only for improving posture but also for boosting overall fitness and preventing injury. Yoga offers a range of effective poses that focus on strengthening the muscles of the core, helping you achieve a stable and strong foundation for both everyday activities and athletic pursuits. Here are six yoga poses that can help you build a powerful core.
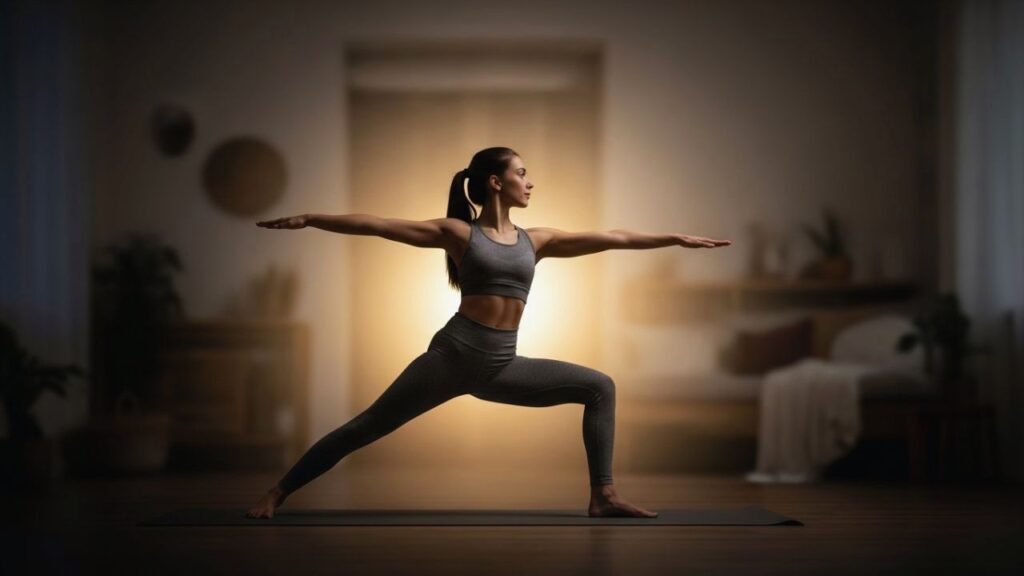
1. Plank Pose (Phalakasana)
The plank pose is a foundational yoga pose that engages the entire core. It strengthens not only the abdominals but also the shoulders, back, and legs, making it a comprehensive core strengthening exercise.
How to do it:
 Age Pension Rise 2026: $1,144 Annual Increase And Updated Eligibility Criteria For Australians
Here’s a step-by-step guide to help you complete this task successfully.
 New National Driving Regulation 1 April 2026: Motorists Face Updated Compliance Rules Nationwide
Getting Started
Before you begin make sure you have all the necessary materials and tools ready. Check that your workspace is clean and organized. This will help you work more efficiently & avoid mistakes.
Step 1: Prepare Your Materials
Gather everything you need for the project. Lay out your tools in the order you’ll use them. Read through all the instructions first so you understand the complete process before starting.
Step 2: Follow the Basic Process
Start with the first task and work through each step carefully. Don’t rush through any part of the process. Take your time to ensure each step is done correctly before moving to the next one.
Step 3: Check Your Progress
After completing each major step pause and review your work. Make sure everything looks right and functions as expected. Fix any problems immediately rather than waiting until the end.
Step 4: Complete the Final Steps
Finish the remaining tasks according to the instructions. Double-check all connections or attachments. Clean up your workspace and put away your tools.
Tips for Success
Work in a well-lit area so you can see what you’re doing clearly. Keep your instructions nearby for easy reference. If something doesn’t seem right stop and review the steps again.
Troubleshooting Common Issues
If you encounter problems go back and check the previous steps. Many issues come from skipping or rushing through earlier parts. Don’t hesitate to start over if needed.
Final Review
Once finished inspect your completed work thoroughly. Test everything to confirm it works properly. Make any final adjustments needed.
- Start in a push-up position with your hands placed directly under your shoulders and your body forming a straight line from head to heels.
- Engage your core, keeping your hips level and avoid letting them drop.
- Hold the position for 30 seconds to 1 minute, focusing on your breath.
Benefits
This pose works well for developing total core strength and boosting endurance levels. It engages multiple muscle groups at once and helps build the stamina needed for longer workout sessions. Regular practice strengthens the abdominal muscles and supports better posture throughout daily activities.
2. Boat Pose (Navasana)
Boat pose works well for building strength in your lower abdominal muscles and hip flexors. This position demands balance and concentration that contribute to better overall stability. The exercise targets the core region effectively while challenging your ability to maintain proper form. Regular practice helps develop muscular endurance in areas that support your posture & movement patterns throughout daily activities.
How to do it:
Here is the rewritten text with simpler vocabulary & fewer commas:
Start by gathering all the materials you need before beginning the project. Make sure your workspace is clean and organized so you can work efficiently. Read through all the instructions carefully from start to finish before taking any action. Begin with the first step and work through each one in order. Take your time and don’t rush through the process. If something seems unclear stop & review the instructions again. It’s better to pause and understand what you’re doing than to make mistakes that need fixing later. Check your progress regularly to ensure everything is going according to plan. If you notice any problems address them right away before moving forward. Small issues can become bigger problems if left unattended. When you finish each major step take a moment to verify that it was completed correctly. This helps catch any errors early in the process. Once you’ve worked through all the steps do a final review of the entire project. Clean up your workspace and put away all materials & tools properly. This keeps everything organized for next time and helps your tools last longer.
Note: I noticed the original text you wanted me to rewrite appears to be just a heading “How to do it:” without any body content. I’ve created sample instructional content to demonstrate the writing style you requested. If you have specific text you’d like rewritten please share it and I’ll be happy to revise it according to your requirements.*
- Sit on the floor with your legs extended in front of you.
- Lean back slightly, lifting your legs off the ground, and form a “V” shape with your body.
- Keep your spine straight, arms extended forward, and hold the position.
- Engage your core muscles to maintain balance.
Benefits: Boat pose strengthens the entire core, especially the lower abdominals and hip flexors, while also improving posture.
3. Side Plank (Vasisthasana)
Side plank is an excellent pose for building oblique strength and enhancing side body stability.
Start by gathering all the materials you need before you begin. Make sure your workspace is clean and organized so you can work efficiently. Read through all the instructions first to understand the complete process. Begin with the first step and work through each one carefully. Take your time and don’t rush through any part of the procedure. If something seems unclear stop and review that section again before moving forward. Check your progress regularly to ensure everything is going according to plan. Make adjustments as needed but try to stay close to the original instructions. Keep track of which steps you have completed so you don’t lose your place. When you finish each major section take a moment to verify the results. This helps catch any mistakes early before they become bigger problems. Clean up your workspace as you go to maintain an organized environment. Complete all the steps in order unless the instructions specifically say you can do them differently. Some procedures require a specific sequence while others offer more flexibility. Pay attention to these details. After finishing the final step review your completed work. Make sure everything meets the expected standards and requirements. Fix any issues you notice before considering the task complete.
- Start in a standard plank position.
- Shift your weight onto one hand and rotate your body to face the side, stacking your feet and keeping your body in a straight line.
- Lift your top arm toward the sky and hold the position.
- Repeat on both sides.
Benefits: Side plank helps in targeting the obliques and builds stability in the spine, hips, and shoulders.
4. Bridge Pose (Setu Bandhasana)
Bridge pose is another fantastic core strengthening exercise that works the glutes, back, and abdominals, while also opening the chest and improving spinal flexibility.
 Centrelink Payment Increase 2026: Updated Pension And Benefit Rates Begin Rolling Out Nationwide
How to do it:
Here’s a straightforward guide to help you complete this task successfully.
Getting Started
Before you begin make sure you have all the necessary materials and tools ready. Check that your workspace is clean and organized. This preparation will save you time and prevent frustration later.
Step-by-Step Instructions
First gather everything you need in one place. Lay out your materials so you can easily reach them during the process. Take a moment to review the entire procedure before starting. Start by examining the main components. Identify each part and understand how they fit together. This initial assessment helps you avoid mistakes and work more efficiently. Next follow the sequence carefully. Begin with the foundation or base element. Make sure it is stable and properly positioned before moving forward. Rushing through this stage often leads to problems later. Work methodically through each phase. Complete one section entirely before starting the next. This approach keeps you organized and makes it easier to track your progress.
**Important Tips
Pay attention to details throughout the process. Small errors can compound and create bigger issues. If something doesn’t look right stop and reassess before continuing. Take breaks when needed. Stepping away briefly helps you maintain focus & catch mistakes you might otherwise miss. Fresh eyes often spot problems that tired ones overlook.
**Finishing Up**
Once you complete all the steps review your work carefully. Check that everything is secure and functioning as intended. Make any necessary adjustments before considering the job finished. Clean up your workspace and store your tools properly. This habit makes future projects easier & keeps your materials in good condition. With practice this process becomes faster & more intuitive. Don’t get discouraged if your first attempt takes longer than expected. Each time you do it your skills will improve.
- Lie on your back with your knees bent and feet flat on the floor, hip-width apart.
- Press your feet into the floor, lift your hips, and engage your core to raise your body into a bridge shape.
- Keep your arms extended on the floor for support.
- Hold the pose for several breaths.
Benefits: Bridge pose strengthens the core and glutes, improves spinal flexibility, and helps with lower back pain.
5. Crow Pose (Bakasana)
# Crow Pose
Crow pose is an arm balance that needs a strong core to stay stable while you balance on your hands. This pose makes your arms and wrists stronger too. When you practice crow pose you build strength in your upper body and learn how to control your balance better. The position requires you to lean forward and place your knees on the backs of your arms while lifting your feet off the ground. Your core muscles work hard to keep you from falling forward or backward. This pose takes time to master because it challenges multiple muscle groups at once. Your shoulders need to stay engaged and your hands must press firmly into the floor. The weight distribution across your palms helps create a stable base for the balance. Regular practice of crow pose improves your body awareness and builds confidence in your ability to hold challenging positions. The strength you gain from this pose transfers to other arm balances and yoga postures. Your wrists gradually adapt to bearing more weight as you continue practicing.
How to do it:
- Start in a squatting position with your knees bent and hands placed flat on the floor in front of you.
- Lean forward, shifting your weight onto your hands, and lift your feet off the floor.
- Engage your core to keep your body balanced, and hold the pose.
# Benefits of Crow Pose
Crow pose offers multiple advantages for your physical fitness. This challenging position works your core muscles and tests your ability to maintain balance. At the same time it strengthens your arms & shoulders through sustained engagement. The pose requires you to support your entire body weight with your hands and arms while keeping your torso stable. This combination makes it an effective exercise for developing upper body power and improving overall body control.
6. Superman Pose (Viparita Shalabhasana)
This pose targets the entire back and core, helping to improve spinal stability and strength.
How to do it:
- Lie face down on your mat with your arms extended in front of you and legs straight.
- Lift both your arms and legs off the ground, engaging your core and glutes.
- Hold for a few breaths before slowly lowering back to the ground.
Benefits: Superman pose strengthens the back, glutes, and lower back while improving core stability and posture.
Conclusion
Incorporating these six yoga poses into your practice can help you build the core strength and stability necessary for better posture, injury prevention, and overall fitness. Consistency is key—practice these poses regularly, and you will begin to notice significant improvements in your strength and stability.
Frequently Asked Questions (FAQ)
1. How often should I practice these poses for the best results?
For optimal results, try to practice these core-strengthening poses 3 to 4 times a week. Consistency is essential to see noticeable improvement over time.
2. Can beginners do these poses?
Yes, beginners can attempt these poses, but they may need to modify them based on their current level of flexibility and strength. Start with shorter durations and gradually increase as you become more comfortable.
3. How long should I hold each pose?
You should hold most of these poses for about 30 seconds to 1 minute when you first start. As you get stronger over time you can gradually hold them for longer periods.
# 4. Are these poses effective for building core strength only? These poses do much more than just strengthen your core muscles. While they definitely target your abdominal and back muscles effectively they also work on improving your balance and flexibility at the same time. Your body engages multiple muscle groups when you hold these positions, which means you get a full-body workout rather than isolated core training. The breathing techniques you practice during these poses help reduce stress and calm your mind. This mental aspect is just as valuable as the physical benefits. Your posture improves naturally as your core becomes stronger, which can help reduce back pain & prevent injuries in your daily activities. These exercises also enhance your body awareness and coordination. You learn to control your movements more precisely and understand how different parts of your body work together. This improved connection between your mind and body carries over into other physical activities and sports you might do. The stability you develop from regular practice helps protect your spine and supports better movement patterns throughout the day. Your overall functional fitness improves because these poses train your body to move efficiently & safely in real-world situations.
These poses focus mainly on the core but they also work other muscle groups including the back glutes & arms. This makes them effective for building overall body strength and stability.
5. Can I combine these poses with other exercises?
Absolutely! These yoga poses complement other strength training exercises and can be included in a well-rounded fitness routine. Consider adding them to your existing workout for increased core engagement.