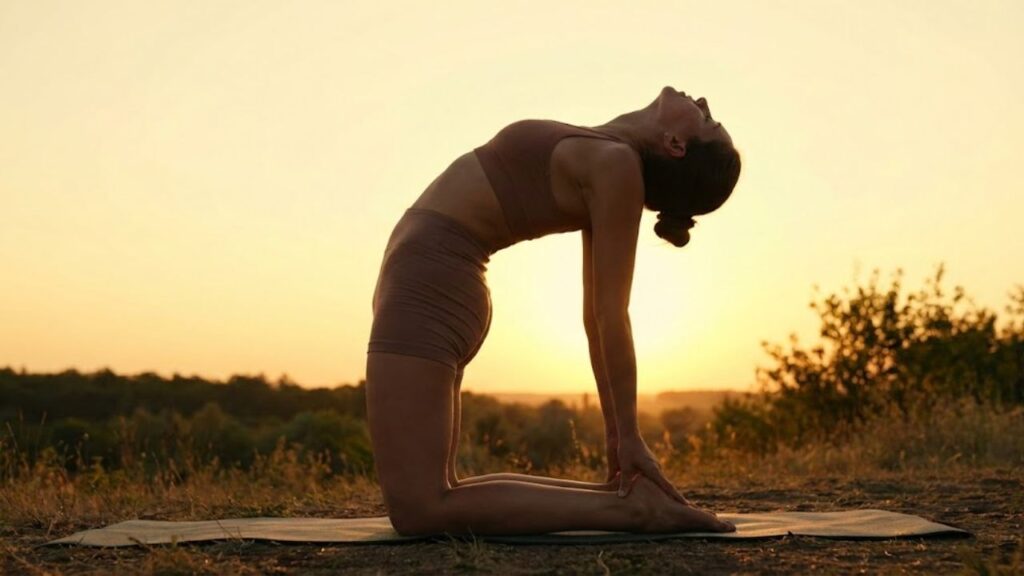
Yoga is not only great for mental peace but also plays a pivotal role in maintaining spine health and flexibility. With today’s lifestyle often being sedentary, yoga provides an effective way to combat stiffness, reduce back pain, and improve overall spinal mobility. Below, we’ll explore the essential yoga poses that can enhance your spine health and flexibility.
Why is Spine Health Important?
A healthy spine plays a vital role in your overall health. It provides structural support for your body and enables you to move freely while protecting the central nervous system that controls every bodily function. Practicing yoga on a regular basis helps prevent common spinal problems such as stiffness and persistent back pain as well as alignment issues. When you perform yoga poses designed to lengthen and strengthen your spine you naturally improve your flexibility and gain better mobility while releasing built-up tension in your back muscles.
Key Yoga Poses to Boost Spine Health
1. Cat-Cow Pose (Marjaryasana-Bitilasana)
The Cat-Cow pose involves moving smoothly between two positions that work to stretch and strengthen your spine. This exercise helps make your neck spine and shoulders more flexible. It also encourages you to maintain better posture throughout your daily activities. The movement pattern creates a gentle rhythm that warms up your back muscles and increases blood flow to the spinal discs. Regular practice of this pose can reduce stiffness and tension that builds up from sitting or standing for long periods. The alternating motion massages your internal organs and helps coordinate your breathing with physical movement.
 Age Pension Rise 2026: $1,144 Annual Increase And Updated Eligibility Criteria For Australians
# How to do it:
 New National Driving Regulation 1 April 2026: Motorists Face Updated Compliance Rules Nationwide
Here is the rewritten text with normal vocabulary and minimal commas:
The process is straightforward when you break it down into simple steps. Start by gathering all the materials you need before beginning. This saves time and prevents interruptions later. First you should prepare your workspace. Make sure the area is clean & organized. Remove any items that might get in the way. Good lighting helps you see what you are doing clearly. Next review the instructions carefully. Read through everything at least once before starting. This gives you a complete picture of what needs to happen. Understanding the full process prevents mistakes. Begin with the initial step and work methodically. Take your time with each part. Rushing often leads to errors that require fixing later. Focus on accuracy rather than speed. Check your progress regularly. Compare what you have done against the instructions. Make adjustments if something does not look right. Catching problems early makes them easier to correct. When you finish each section move on to the next one. Keep your workspace tidy as you go. Put away tools and materials you no longer need. This prevents clutter from building up. After completing all the steps do a final inspection. Look over everything to ensure it meets the requirements. Test the results if applicable. Make any necessary corrections before considering the job done. Clean up your workspace when finished. Store materials properly for future use. Dispose of waste appropriately. A clean ending makes the next project easier to start.
- Start on all fours, with your wrists aligned under your shoulders and knees under your hips.
- Inhale as you drop your belly toward the floor, lifting your head and tailbone (Cow pose).
- Exhale as you round your back, tucking your chin toward your chest (Cat pose).
- Repeat this flow for 10-15 rounds.
Benefits: Enhances spine flexibility and reduces tension in the back and neck.
2. Child’s Pose (Balasana)
Child’s Pose is a restorative pose that gently stretches the back, hips, and thighs, promoting spinal alignment and relaxation.
# How to do it:
The process begins by gathering all necessary materials and tools before starting any work. Make sure you have a clean workspace with adequate lighting and ventilation. Read through all instructions completely at least once before beginning. Start by preparing your materials according to the specifications provided. Measure everything twice to ensure accuracy before making any cuts or permanent changes. Lay out all components in the order you will need them to streamline the assembly process. Follow each step in sequence without skipping ahead. Take your time with each stage and verify that everything is properly aligned and secured before moving forward. If something doesn’t fit correctly or seems wrong, stop and review the instructions rather than forcing it. Use the appropriate tools for each task. The right equipment makes the job easier and produces better results. Apply steady pressure when fastening components together but avoid overtightening which can damage materials or strip threads. Check your progress regularly against the provided diagrams or photos. This helps catch any mistakes early when they are easier to correct. Make adjustments as needed to ensure everything remains level and properly positioned. Once assembly is complete perform a final inspection of all connections and joints. Test any moving parts to confirm they operate smoothly. Clean up your workspace and dispose of any packaging materials appropriately. If you encounter difficulties at any point, consult the troubleshooting section or contact customer support for assistance. Keep all documentation and warranty information in a safe place for future reference.
- Begin in a kneeling position with your knees spread wide apart.
- Slowly lower your torso towards the floor, extending your arms forward or resting them by your sides.
- Hold for 30 seconds to 1 minute, focusing on deep breathing.
# Benefits of This Practice
This exercise helps reduce tightness and discomfort in your back muscles. It gently stretches your spine to make it longer and more flexible. The practice also helps you feel calmer and less stressed throughout your day.
3. Downward-Facing Dog (Adho Mukha Svanasana)
# Downward-Facing Dog
Downward-Facing Dog is a well-known yoga pose that extends your entire spine while stretching your hamstrings and calves and shoulders. This position helps lengthen your back from top to bottom. At the same time it works on the muscles in the back of your legs and opens up your shoulder area. The pose creates a triangle shape with your body where your hips point upward toward the ceiling. Many yoga practitioners use this pose as a resting position during their practice. It appears frequently in yoga sequences and serves as a transition between other poses. The position strengthens your arms and legs while improving flexibility throughout your posterior chain.
# How to do it:
Here is the rewritten text with simpler vocabulary and fewer commas:
**How to do it:**
Start by gathering all the materials you need for the project. Make sure everything is ready before you begin working. This will save you time and prevent interruptions later. Read through all the instructions carefully from start to finish. Understanding the complete process helps you avoid mistakes. Take note of any warnings or special requirements mentioned in the steps. Prepare your workspace by cleaning the area and organizing your tools. A tidy environment makes the work easier and safer. Keep everything within easy reach so you don’t have to search for items while working. Follow each step in the exact order given. Skipping ahead or changing the sequence can lead to problems. Complete one step fully before moving to the next one. Take your time & work at a steady pace. Rushing through the process often creates errors that require fixing later. Focus on doing each part correctly rather than finishing quickly. Check your progress regularly to ensure everything looks right. Compare your work to any diagrams or photos provided in the instructions. Make adjustments immediately if something seems wrong. Clean up your workspace when you finish. Put away all tools and materials properly. Dispose of any waste according to local guidelines. Review the final result to confirm everything works as expected. Test the completed project if applicable. Make note of anything you learned for future reference.
- Start on your hands and knees. Lift your hips toward the ceiling, forming an inverted “V” shape with your body.
- Keep your hands shoulder-width apart and feet hip-width apart.
- Hold the position for 30 seconds, trying to push your heels towards the ground.
Benefits: Stretches and strengthens the back, improves spinal alignment, and helps increase flexibility in the legs and shoulders.
4. Cobra Pose (Bhujangasana)
Cobra Pose builds strength in the lower back muscles & lengthens the entire spine. This position works well for reducing back discomfort and helping you stand and sit with better alignment.
 Centrelink Payment Increase 2026: Updated Pension And Benefit Rates Begin Rolling Out Nationwide
How to do it:
- Lie flat on your stomach with your hands placed under your shoulders and elbows tucked in.
- Slowly lift your chest off the ground by pressing your hands into the floor.
- Arch your back gently while keeping your elbows slightly bent.
- Hold for 15-30 seconds and then slowly lower back down.
# Benefits: Strengthens the spine and opens up the chest promoting better posture. This exercise works to build strength throughout your entire spine while simultaneously expanding the chest area. The combined effect of these two actions leads to significant improvements in how you hold your body throughout the day. When your spine becomes stronger it provides better support for your upper body. At the same time opening the chest helps counteract the forward slouching position that many people develop from sitting at desks or looking at phones. Together these benefits create a natural alignment that makes standing & sitting with proper posture feel more effortless and comfortable over time.
5. Seated Forward Fold (Paschimottanasana)
This seated stretch works to make your spine & hamstrings longer while helping your back & legs become more flexible.
How to do it:
- Sit on the floor with your legs extended straight in front of you.
- Inhale, lengthen your spine, and then exhale as you fold forward, reaching your hands toward your feet.
- Hold for 30 seconds to 1 minute.
Benefits: Stretches the spine, hamstrings, and back, improving overall flexibility.
6. Bridge Pose (Setu Bandhasana)
Bridge Pose is excellent for strengthening the lower back and glutes while providing a gentle stretch to the spine and chest.
How to do it:
- Lie on your back with your knees bent and feet flat on the floor.
- Press your feet into the floor and lift your hips towards the ceiling.
- Keep your arms by your sides or clasp your hands underneath your back.
- Hold for 20-30 seconds.
Benefits: Strengthens the lower back, glutes, and legs while opening the chest and improving spinal alignment.
7. Spinal Twist (Supta Matsyendrasana)
Spinal Twists are excellent for enhancing spine mobility and relieving tension in the back.
How to do it:
- Lie on your back with your arms stretched out to the sides.
- Bend your knees and gently drop them to one side, keeping your shoulders on the ground.
- Hold the pose for 30 seconds, then switch sides.
This pose helps make your spine more flexible while stretching your back muscles & reducing built-up tension in your body.
Tips for Practicing Yoga for Spine Health
- Focus on Alignment: Proper alignment ensures that you’re getting the most out of each pose and avoiding strain.
- Breathe Deeply: Deep breathing helps to relax your body and allows deeper stretches.
- Avoid Overstretching: Go at your own pace and avoid pushing your body too far beyond its limits.
- Incorporate Regular Practice: Consistency is key when it comes to improving flexibility and spinal health. Aim for at least 3-4 sessions per week.
Conclusion
Incorporating these essential yoga poses into your routine can have a profound impact on your spine health and flexibility. Whether you’re dealing with stiffness or simply looking to improve your overall posture, yoga offers an accessible and effective way to achieve lasting benefits for your spine.
FAQ
Q1: How often should I practice yoga for spine health?
A1: Practicing yoga 3-4 times a week can significantly improve spine health and flexibility. Consistency is key, but make sure to listen to your body and avoid overdoing it.
Q2: Can yoga help relieve chronic back pain?
A2: Yes, certain yoga poses can help alleviate chronic back pain by strengthening the muscles around the spine, improving flexibility, and releasing tension.
Q3: Are there any yoga poses to avoid with a bad back?
A3: If you have a bad back, avoid deep backbends and poses that require excessive twisting. Always consult a healthcare professional before starting yoga with a pre-existing condition.
Q4: How long should I hold each pose?
A4: Generally, hold each yoga pose for 20-30 seconds to allow your muscles to stretch properly. For more restorative poses, like Child’s Pose, you can hold longer.
Q5: Can yoga help with posture?
A5: Yes, yoga strengthens the muscles that support your spine, improving posture over time. Regular practice of spine-lengthening poses can promote better alignment and reduce slouching.